I once spent an hour manually copying a NetSuite workflow from sandbox to production. I rebuilt its states, actions, transitions, and related components—and still made mistakes.
Workflows can depend on custom records, fields, SuiteScripts, and other account components. Moving each piece separately makes it easy to miss a dependency or copy the wrong version.
I wanted a faster process I could verify before changing production.
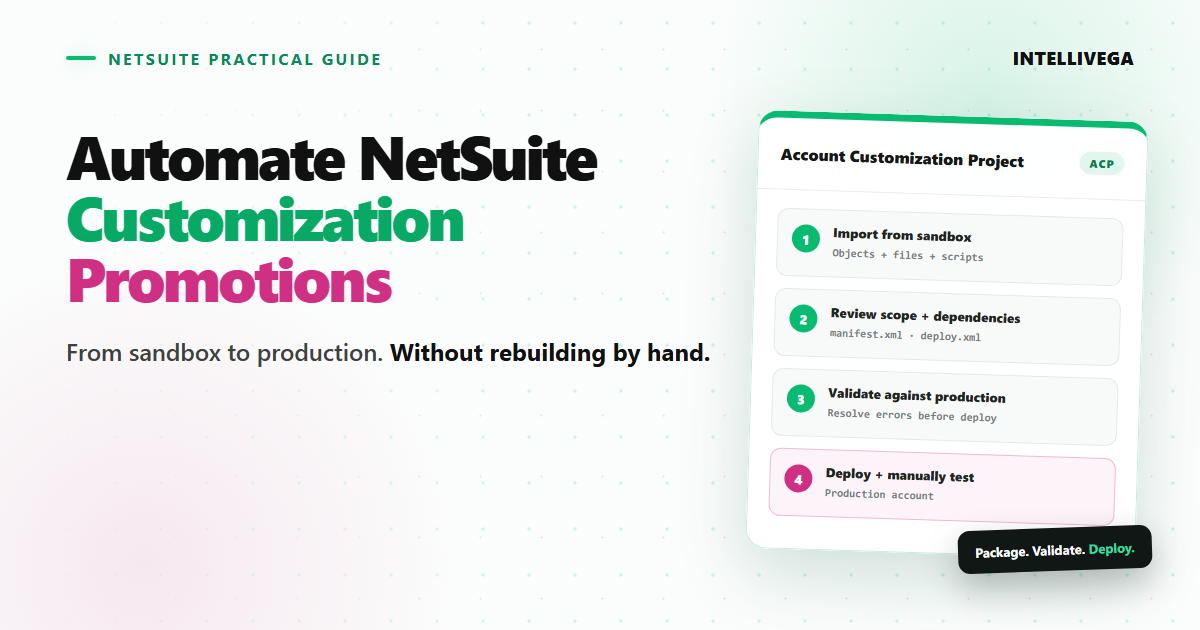
An Account Customization Project (ACP) packages the related objects and files, records dependencies, validates them against the target account, and deploys them together. Review and testing remain manual.
This guide uses a workflow, custom record, and SuiteScript as an example. The same process applies to other objects supported by the SuiteCloud Development Framework (SDF).
The process at a glance
Sandbox customization
        ↓ import
Account Customization Project
        ↓ review dependencies and deployment scope
Validate against production
        ↓ deploy only after validation succeeds
Production account
        ↓
Manual business test
Here, promotion means the complete process from sandbox import through production testing. Deploy Project is the command that changes the target account.
Why use an Account Customization Project?
NetSuite's Copy to Account button can be convenient for a straightforward customization.

Copy to Account was not enough for my complex workflow, so I copied it by hand. Because it depended on related records, fields, a script, and account components, I needed to move it as one reviewed unit.
An ACP shows what will be deployed, what already needs to exist in the target account, and what must be fixed before deployment.
It can also be versioned, reviewed, tested, and reused for the next release.
ACPs are intended for development, sandbox, and production accounts you own.
Important: An ACP is not a removable package. Oracle notes that it cannot be uninstalled after deployment, so unwanted components must be removed manually. Deploying an object with the same script ID replaces the target account's version; files and scripts with matching names are overwritten as well. Treat the project as deployment source code and review it accordingly.
Before you begin
Install the local tools
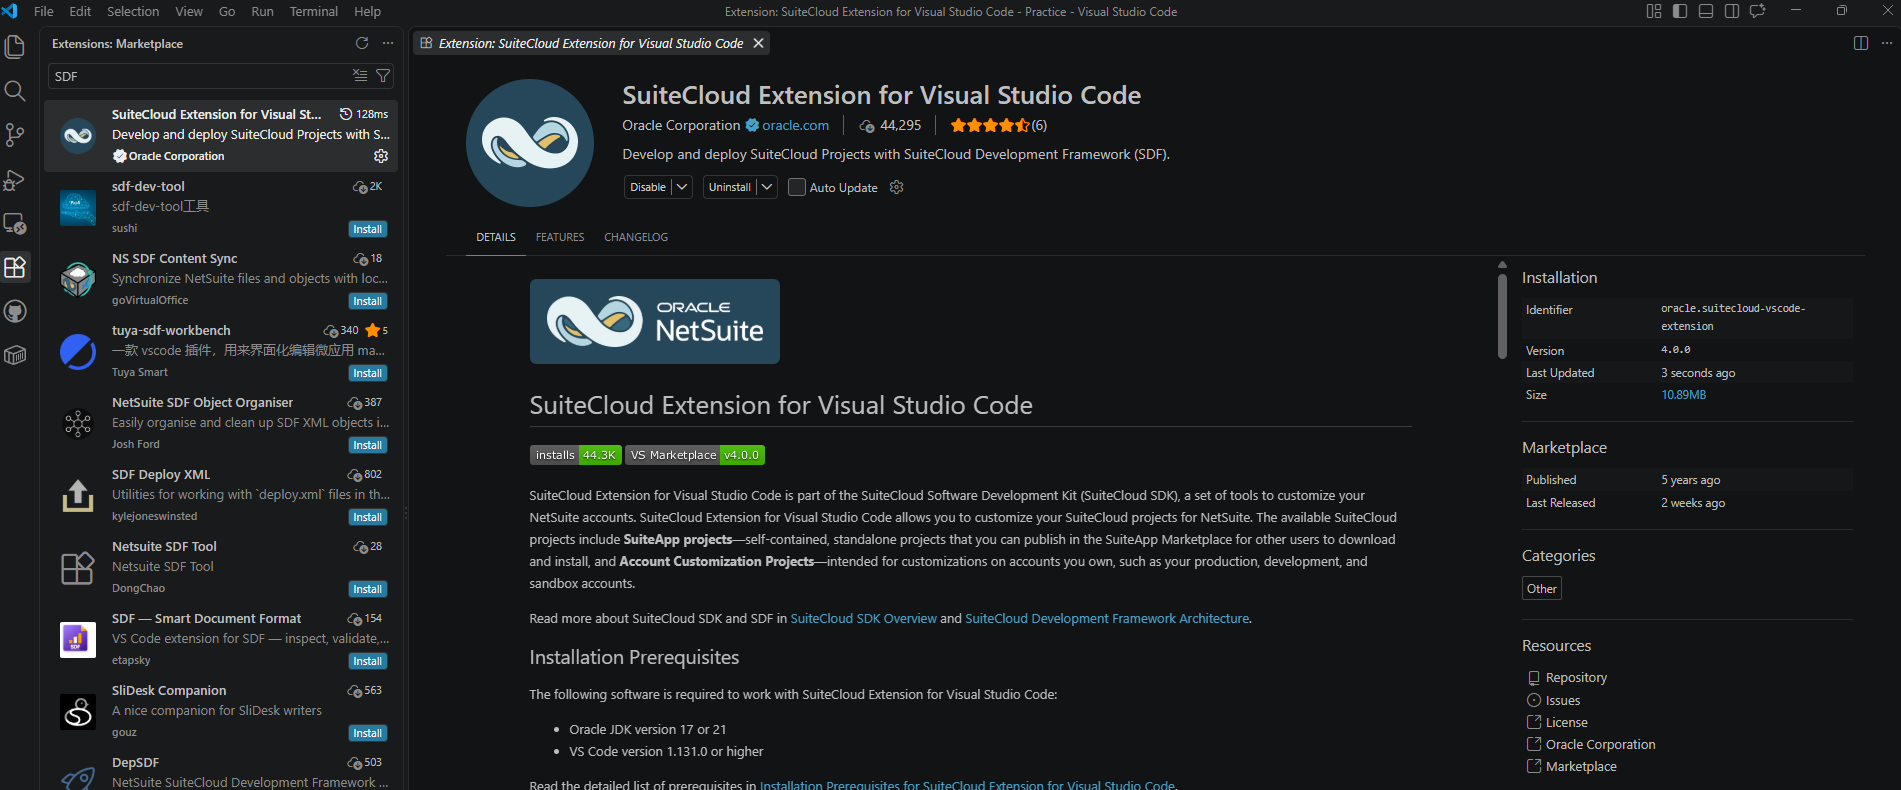
This guide uses the free SuiteCloud Extension for Visual Studio Code. Oracle also offers SuiteCloud tools for other IDEs and the command line.
For the VS Code extension, install:
- Visual Studio Code
- Oracle JDK 17 or 21
- The SuiteCloud Extension for Visual Studio Code
The extension currently requires VS Code 1.131.0 or later. Check its listing for current requirements.
Prepare the NetSuite accounts
In both sandbox and production, an administrator must:
- Enable SuiteCloud Development Framework and the features required by the customization.
- Enable OAuth 2.0 when browser-based authentication will be used.
- Assign an appropriate Developer or customized Developer role.
- Give that role access to the types of customizations being imported or deployed.
Permissions vary by project and security policy. Follow Oracle's SDF account setup and Developer role guidance.
1. Create an Account Customization Project
Open the VS Code Command Palette with Ctrl+Shift+P, type suitecloud, and select SuiteCloud: Create Project.
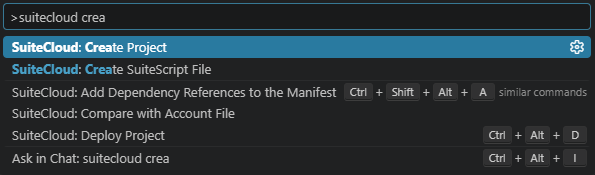
Choose a parent folder, select Account Customization, name the project, and include Jest only if you plan to write SuiteScript unit tests.
Open the new project folder. If SuiteCloud cannot detect it, open a project file in the editor and retry the command.
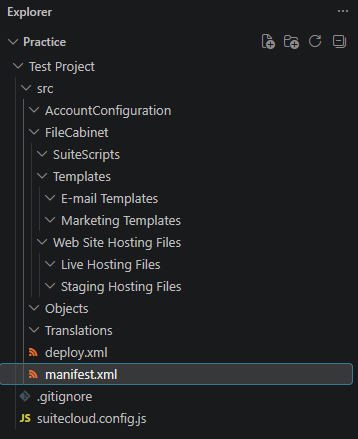
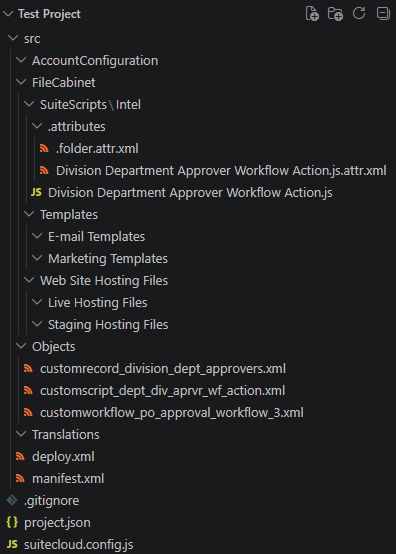
The project contains SDF folders plus deploy.xml, which controls deployment scope, and manifest.xml, which records dependencies.
2. Authenticate to the sandbox
Run SuiteCloud: Set Up Account and create a sandbox authentication ID. Use browser-based authentication unless your organization uses machine-to-machine authentication.
Use clear, distinct aliases such as company-sandbox-developer and company-production-developer. Each alias identifies an account-role combination.
Make the sandbox authentication ID the project default and confirm it in the status bar. Snapshot an existing project before importing because matching local components will be overwritten.
Oracle's account setup instructions describe both browser-based and machine-to-machine authentication.

3. Import the complete customization from sandbox
Run SuiteCloud: Import Objects and select the workflow, custom record type, script record, and other objects owned by the customization. Fields defined inside a record or workflow come with its XML; separately defined fields must be selected individually. Filter by script ID when needed.
Choose to import referenced SuiteScript files, review the selection, and confirm the overwrite. Object XML appears under Objects; scripts appear under FileCabinet/SuiteScripts.
Use SuiteCloud: Import Files for supporting modules, templates, or other required files not referenced by an imported object. Import Objects and Import Files are separate commands.
This ACP contains:
- The workflow
- The custom record type used by the workflow
- The SuiteScript and its script/deployment record
- Every custom field or other custom object owned by this deployment
Import components the release should create or update. If a component already exists in both accounts and is managed elsewhere, reference it as an account dependency instead.
Locked record types must be unlocked or left outside the project as dependencies.

4. Add dependencies after importing objects and files
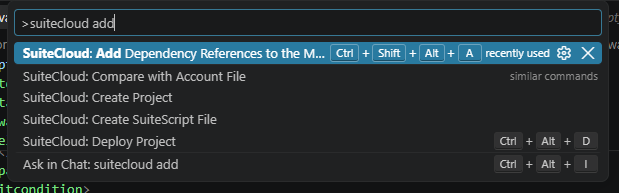
After importing everything the release owns, run SuiteCloud: Add Dependency References to the Manifest to update manifest.xml.
Run this last so a component you intend to deploy is not mistaken for an external dependency.
Review the result. Feature dependencies must be enabled in production; object dependencies must already exist there. manifest.xml does not deploy them.
5. Define the deployment scope in deploy.xml
Open deploy.xml and confirm it includes only the configuration, files, and objects being promoted.
This project uses broad wildcards because it contains only one release:
<deploy>
    <configuration>
        <path>~/AccountConfiguration/*</path>
    </configuration>
    <files>
        <path>~/FileCabinet/*</path>
    </files>
    <objects>
        <path>~/Objects/*</path>
    </objects>
    <translationimports>
        <path>~/Translations/*</path>
    </translationimports>
</deploy>
Do not broaden narrower generated paths to match this example. Use wildcards only when everything they match belongs in the release; otherwise list the exact files and objects.
Order dependencies before the components that use them. SDF processes explicit paths sequentially and orders files matched by a wildcard. See Oracle's deployment preparation guidance.
6. Authenticate to production and validate first
Create a separate production authentication ID with SuiteCloud: Set Up Account, make it the project default, and verify the account and role in the status bar. Validation and deployment now target production.
Run SuiteCloud: Validate Project. It checks the contents of deploy.xml against production without deploying them. Stop on account-specific values first; continue with warnings only after reviewing them.
The Output tab reports each validation stage and groups problems by file. Here, it found a referenced SuiteScript file missing from the project:
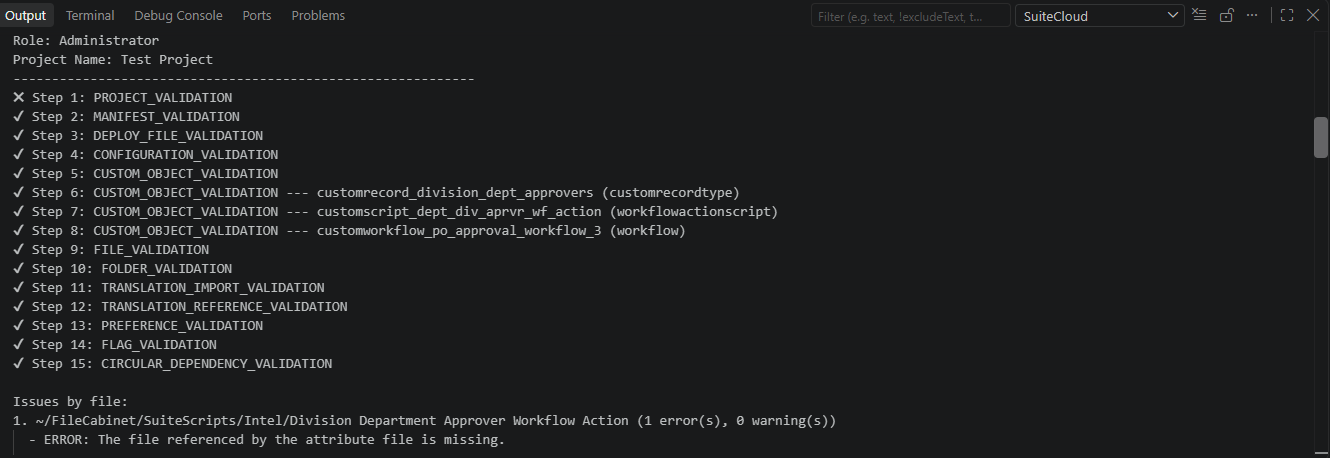
Validation turned a potential production failure into a specific file error.
Fix every error, review every warning, and validate again until the project succeeds.
7. Deploy the validated project to production
Before deploying:
- Save the successful validation output.
- Confirm the change is approved.
- Commit or otherwise snapshot the project.
- Review
deploy.xmland the files it matches. - Confirm that production does not contain newer manual changes this deployment would overwrite.
- Confirm the active production authentication ID one final time.
Validation is not rollback. Preserve the current production versions before replacing them. Recovery may require redeploying those versions and manually removing new components because an ACP cannot be uninstalled.
For a high-impact change, have a second person verify the account and scope. Then run SuiteCloud: Deploy Project.
SDF packages and validates the contents of deploy.xml, then deploys them to the active account. Save the successful Output summary with the release record. See Oracle's deployment instructions.
8. Test the result manually in NetSuite
A successful deployment does not prove the customization works. In production, verify that:
- The workflow, custom record, fields, scripts, and script deployments exist.
- Script deployments use the intended status, audience, event types, and parameters.
- The workflow uses the intended release status, audience, contexts, and conditions.
- Referenced File Cabinet files and account dependencies resolve correctly.
- A controlled production test follows the expected workflow path.
- System Notes, Workflow History, and script execution logs show no unexpected errors.
I tested this promotion manually in production. Exercise the primary path, confirm the result, and check the relevant logs. When safe, test an alternate path too. Record the inputs and results for the next release.
A repeatable promotion checklist
Use this sequence for each sandbox-to-production promotion:
- Finish and test the customization in sandbox.
- Create or open its Account Customization Project.
- Confirm the sandbox authentication ID is active.
- Import every object and file owned by the customization.
- Add dependency references after the imports are complete.
- Review
manifest.xmland limitdeploy.xmlto the intended scope. - Commit or otherwise snapshot the project before production deployment.
- Establish a recovery plan, preserve the current production versions, and confirm there are no newer changes that would be overwritten.
- Switch to the production authentication ID and verify the target account and role.
- Validate the project, resolve every error, and review every warning.
- Deploy the project and save the deployment output.
- Run the manual production test and document the result.
Replace memory with a repeatable process
The real cost of copying the workflow manually was ending with a change I could not confidently reproduce or review. An ACP replaces that memory-driven process with a versioned project, explicit scope, validation, and deployment output.
The next release starts from the same project instead of another hour of careful clicking. That is the useful automation.
References
- Oracle NetSuite, SuiteCloud Development Framework Architecture
- Oracle NetSuite, Account Customization Projects
- Oracle NetSuite, Set Up a NetSuite Account for SDF
- Oracle NetSuite, Assigning the Developer Role
- Oracle NetSuite, Creating a SuiteCloud Project in Visual Studio Code
- Oracle NetSuite, Adding an Account in Visual Studio Code
- Oracle NetSuite, Importing SDF Custom Objects in Visual Studio Code
- Oracle NetSuite, Importing Files in Visual Studio Code
- Oracle NetSuite, Adding Dependencies to the Manifest
- Oracle NetSuite, SuiteCloud Project Deployment Preparation
- Oracle NetSuite, Validating a SuiteCloud Project in Visual Studio Code
- Oracle NetSuite, Deploying a SuiteCloud Project in Visual Studio Code